Microsoft’s flagship email application, Outlook 2013 is really a multi-roles player. It is a perfect tool for managing contacts, calendar, web browsing, note taking, task management and can be used as a journal as well. It is available as a part of Microsoft Office Suite 2013 and its unique features include sleek design, mail previews, weather bar in calendar, social connectors, mail cleanup tools, Attachment reminder, Exchange ActiveSync (EAS), quick message reply through one click, and many more. Microsoft Outlook can be used with Microsoft Exchange Server and with Microsoft SharePoint Server for multiple users in a firm.
 Many PC users believe that configuring MS Outlook is a tedious task, and only a Computer repair professional can do it perfectly. However, this is not true; you can do it yourself by following the steps described here.
For you to be able to use Gmail with Outlook 2013, first you must configure your Gmail account to work with Outlook.
Procedure of configuring Gmail account using IMAP:
i. Sign up your Gmail account
ii. Go to Mail or click on the gear icon located at the right top of the browser. From the drop down menu, click settings.
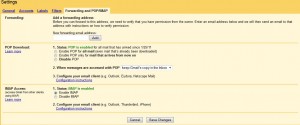 iii. Then click on the Forwarding and POP/IMAP tab to bring up the POP and IMAP settings.
iv. Scroll down to the IMAP access section and select the Enable IMAP radio button.
v. At the bottom of the screen, click on Save Changes and close the browser.
Procedure to configure MS Outlook.
i. Open MS Outlook 2013 and on the menu bar, click on the File tab.
ii. From the drop down menu, click Account Settings.
iii. A dialog box opens, Click on New/ Add Account.
iv. Choose Email Account radio button, which will automatically set up the Gmail account in Outlook. You can also choose Manual Set up or Additional  Server Types then click next. In case you selected the Email Account option, enter your name, email address and your account password then click next.
v. For the Email account option, the automatic process may or may not work and in case it does not, the second option of manual is then preferred. For the Manual Set up or Additional Server types, Choose POP or IMAP radio button, and then click Next.
vi. On the POP and IMAP dialog box, enter the following: User, Server and Log on Information. Select IMAP from the Account Type drop-down list on the Server Information. On the Incoming and outgoing server, enter the following respectively.
• Incoming mail server: imap.googlemail.com
• Outgoing mail server (SMTP): smtp.googlemail.com
Ensure that you enter your correct full email address as well as the User Name.
vii. Click More Setting.
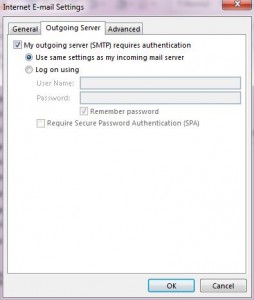 viii. A dialog box known as Internet Email Setting opens. Click on the Outgoing Server Tab and select My outgoing server (SMTP) requires authentication. Ensure that the ‘Use same settings as my incoming mail server’ option is selected.
ix. Once you have completed that, Click on the Advanced tab still on the Internet Email Setting dialog box. Then enter the following
: Incoming server: 993
: Incoming server encrypted connection: SSL
: Outgoing server encrypted connection: TLS
: Outgoing server: 587
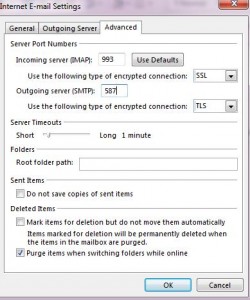 Something to note during this stage: You have to select the type of encrypted connection first to avoid the port number 587 for the Outgoing server from reverting back to port 25 when you change the type of encrypted connection.
x. Click OK to accept the changes and close the More Settings dialog box.
xi. Click Next
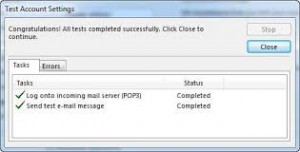
xii. Outlook will immediately start testing the account settings. When the test has finished, click Close
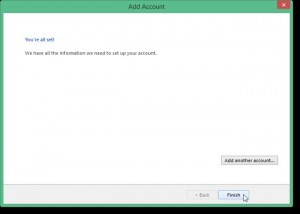
xiii. A pop up screen appears saying “You’re all set!” Click finish
 In the account list, your Gmail address will display alongside any other email addresses that you had added to MS Outlook 2013. The procedure is very simple and straight, just follow the instruction step by step and will have the configured Outlook account up and running. If you encountered any problem or you find it difficult to do it yourself, you can visit a computer repair or laptop
  repair center to get it done quickly.